Category Archives: DIY

Budget-Friendly Weekend Fun / DIY / weekend

Our Laundry Room DIY: The Before and During

March 19, 2014

So, like I said yesterday, we have this large laundry room/basement type area downstairs in our house, which was quickly just becoming a place to house all the things we didn’t want to spend time figuring out how or where to store.

In my mind, 120 square feet is a lot a space.  I mean, this may be because I live in one of the most expensive rental markets in the world.  It may also be because I lived in less than 500 square feet with a giant man (KC) and a very snobby cat (Seuss) for 4 1/2 years.

Either way, KC and I had been tossing around ideas for the laundry space for awhile — workout space?  Guest room?  Indoor hockey rink?  (Yeah, that idea didn’t last long.)

I, being disinclined to do anything that involves manual labor on my part, kept pushing it off — “No, I don’t want to turn it into [insert room type here].”  “That will be too expensive.”  “It’s not a big enough room for that.”

Basically, I’m super fun to live with.

However, with the old couch sitting (what felt like) squarely in the middle of our living room, I finally conceded — “Ok, let’s turn it into a family room.”  Move the old couch down there, and we’d be in business.

A few minor issues — the room has concrete floors.  And not like “nice” concrete floors — like, industrial warped and wonky concrete floors.  Also, there was a giant hole in the wall, the remnant of an old water heater or something.  Either way, there was a 5-6″ circular hole, smack in the middle of the longest wall in the room.  And the lesser issue — all the walls were painted that pukey green color (like the color of rotten algae).

So what did we do?

  1. We cleared out all the crap (this included KC moving a giant IKEA storage cabinet up a flight of stairs and into our hallway.  By himself).
  2. KC patched the hole (he’s magic) and spackled all the weird dents and divots.
  3. We painted.
  4. Moved a wall shelf.
  5. We laid down carpet.
  6. And I styled that business up (y’know, after KC and a friend moved the couch down there).

And because I like to leave you wanting just a little more (and because that room is insanely hard to photograph and I’d like the “after” shots to actually look decent), here’s some before photos and some during shots (post-paint and post-carpet):

basement 1(keep in mind that this is after we’d cleared out most of stuff from the room already…)

basement 2Don’t be fooled by the way the camera makes the green paint look — it’s awful in real life.
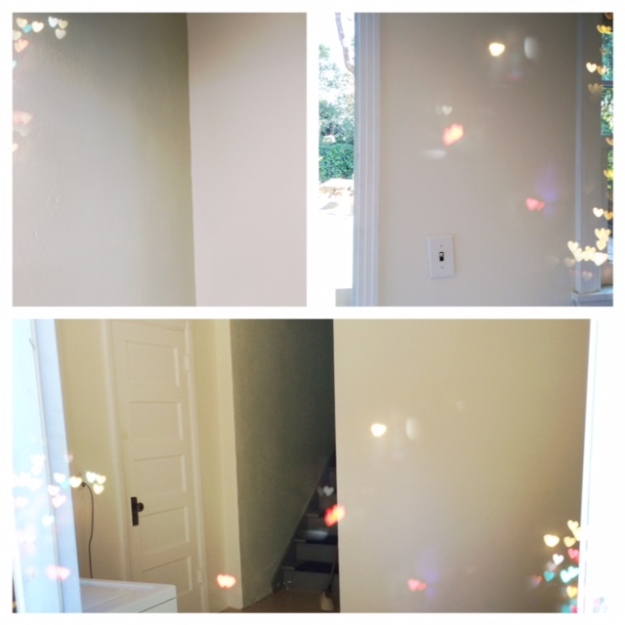
basement 3All painted.

basement 4You can sort of see how wonky the concrete floor is here…

basement 7Carpet!  (And yes, the hallway is still green because it was going to be too hard to paint/we ran out of paint.)

basement 5basement 6

Full reveal of the finished room and what we used for our DIY re-do will be up later!  Get excited.

Budget-Friendly Weekend Fun / DIY / weekend

DIY: Table and Chairs Update

March 18, 2014

After we got our new couch, our old one was moved in front of the large window in our living room, since we didn’t really know what we wanted to do with it.

Couch in windowIt’s a nice couch, and having the extra seating was a nice perk; but I couldn’t get over the fact that it was blocking one of the major features of our living room — the big window — and blocking a lot of light from coming into the space.

Couch in window (a mess)(Please ignore all the crap in that room, we were in the middle of our DIY when I took this.  But you can see how the couch takes up quite a bit of space in there, and why I kept telling KC that I felt like our living room looked like a waiting room with all the couches.)

KC was hesitant to get rid of the old couch, and so it sat in our living room for a few months.

Then KC started talking about our laundry room.  (Weird segue?  Just wait.)  We have this laundry room downstairs, next to our little office, that’s about 10′ x 12′, which is a good chunk of space in the world I live in.  The washer and dryer take up a little bit of the room, obviously, but the rest of the square-footage just kind of became a place to store things (our bikes, stuff from Costco, coolers, etc.).  KC had been talking about turning the laundry room into something more usable for awhile, and then it hit me — we could move the old couch down there and turn it into a family room-type space.  Genius!

However, moving the couch out of the window in the living room meant that there was kind of a big space that would be left empty.

I decided that I could make use of the two dining chairs I hadn’t gotten around to painting during the dining room DIY, and set them up with a crappy old table I bought years ago at Target.  Voila — extra seating, a good filler for the blank space, and it wouldn’t block too much of a light from the window.  Win-win.

Here’s what I started with:

Table 2Table 3A dingy, “wood” (let’s use that term loosely) table and a couple of chairs (that I forgot to photograph in their original state — just picture crappy blonde wood that’s really worn.)

I sanded everything lightly (basically, I just did a once-over with the power sander and touched up the rest by hand), wiped everything down, and then primed the three pieces with one coat of Glidden Gripper Primer in white.

Table PrimedThat primer is the business, you guys.

That got to dry overnight (since we had a dinner to go to), and then I got to painting the next day.  I chose Glidden Oyster Shell for the table and Behr Antique Tin for the chairs (I chose semi-gloss for both).

Table PaintedChairs Painted

These pieces took 2-3 coats of paint (I did 3 coats + a couple touch-ups on the top of the table, since I wanted that part to be really well-covered.)  And even though the process is a little time consuming and kind of messy (or, it is for me anyway):

Paint Hands I think the end result is pretty nice.

Here are the finished pieces in their new spot in the living room:

FinishedFinished 1Finished 2Living roomIf you’re interested in doing your own DIY for finished wood (or “wood”) furniture, here’s what you’ll need and how to do it:

  • The pieces of furniture you want to paint
  • Drop cloth
  • Medium-grit sandpaper (I used 150)
  • Optional: power sander
  • A few clean rags
  • Paint brushes/small roller/paint tray (you can do this just with brushes, but the roller is nice for painting large flat surfaces, like the top of the table)
  • Glidden Gripper Primer (If you’re painting your pieces a dark or vivid color, ask to have your primer dyed grey at the paint counter — it will be easier to cover than the white.)  I used the quart size and had some left over with these
  • Paint (I got a quart of the Oyster Shell and the Antique Tin and had plenty left over)
  1. Lightly sand all your pieces (where you’re going to paint), so the finish is just taken off.  You want to just rough up the surface a bit so the primer has something to adhere to.
  2. Wipe down your furniture to remove any dust, then apply 1-2 thin coats of primer.  Let dry for at least 1 hour, ideally overnight.
  3. Paint 2 (or more, as needed) thin coats of paint, waiting at least an hour between each coat to dry.  (If you’re working on a piece with hinges, be sure to test the moving parts periodically to make sure they don’t get painted shut.)
  4. Let dry for at least 48 hours before using (I’d recommend allowing the paint to cure for about a week before you start using your piece.  You will be able to tell if the paint is dry and set when you touch it — it should no longer feel slightly sticky or tacky.)

DIY / weekend

DIY: updating a table and chairs + a laundry room/living space

March 17, 2014

KC and I had a very productive weekend, where we re-vamped our downstairs laundry room into an extra living space, and spruced up some old crappy chairs and a table we had lying around.

The downstairs DIY started with changing the wall color from pukey-green (top left, below) to Almond Cream (omg, what about how that rhymes!)  I realize that it’s kind of hard to tell what color green our walls were from this picture, so just imagine a combination of avocado, seafoam, and vomit.  That’s pretty much it.

basement paintThe chairs I refinished were two that were leftover from my last dining chair DIY, and the table was a crappy one from Target that I bought a thousand years ago and was getting zero use out of, since it was sitting in the farthest corner of our kitchen.

I decided the three pieces should get new life as a little bistro set:

table and chairs DIYI’ll show you how the transformation of our laundry room and table and chairs turned out (and how we did it) later this week!

PS: Power sander + painting = crazy sore triceps.  Workout of the future!

DIY / Happy Hour

Bar Cart DIY, part 2

October 1, 2013

Wasn’t that so rude how I totally left you hanging yesterday? OMG I KNOW. BUT, it makes today’s post so much more dramatic! (Not really, but let’s pretend!)

In case you’ve forgotten, here’s how this project started:

photoAh yes, the tetanus cart.

And here’s the finished product:

photo (5)Because nothing goes better with bright green chairs than a farmhouse red bar cart, right? Right.

Obviously, there were a few steps in between the rust heap that we started with and the dazzling display of liquor goodness that we ended up with, so here’s how I did it:

How to Paint Metal (for non-crafty, whiney, non-DIYers like me)

Materials:

  1. I sanded the surface of the cart a bit to try and smooth out some of the unevenness. By “a bit,” I mean “barely at all,” because I hate sanding.
  2. Wipe down the cart and make sure all dust is removed.
  3. Cover wheels with plastic and tape in place (since you won’t want to paint those). *This was super annoying and KC finally stepped in an did it for me after I whined for like 10 minutes straight. (Like I said: not crafty, not patient.)
  4. Spray at least two solid coats of primer, allowing at least 30 minutes in between each coat to dry. Touch up after each coat.
  5. Spray at least two solid coats of paint, allowing at least 30 minutes in between each coat to dry. Touch up after each coat.

Ideally, you wouldn’t want to leave the cart out in the rain at this point — but that’s exactly what we did (not exactly on purpose). We had both been working outside (me: painting a metal cart, him: assembling an outdoor heat lamp and helping me with the annoying parts of painting a metal cart), and decided to grab Thai food after finishing up our projects. I asked if we should move the cart inside to dry, since it looked like it might rain. KC assured me that it wouldn’t rain and said we should just leave it outdoors.

It totally got rained on.

Luckily, this Rustoleum business seems to be pretty amazing and waterproof (one of the major reasons I chose it), so the cart wasn’t worse for wear at all.

So here are some of the steps in picture form:

Primed:

photo (2)

Painted:

photo (4)photo (3)

Ready for business:

photo(1)

DIY

Bar Cart DIY

September 30, 2013

As some of you may recall, I have had some color issues with my dining room.

dining room

After some surfing on Pinterest, I came up with the genius idea of adding more color to the room via a repurposed, industrial bar cart.  We actually have a bar cabinet already, but I wanted something open where I could see what we had stocked, liquor-wise, and where I could mix a drink without worrying about ruining an expensive piece of furniture.  (I’m really good at spilling things.  Last weekend I spilled an entire bowl of miso soup on myself while at dinner with some new friends.  It wasn’t embarrassing at all.)

So, with my grand idea in mind, off to the Alameda County Flea Market I went.  And while there, I scored this:

photoDo you not see the potential?  Only the potential for a terrible bout of tetanus?  Well, not to worry, KC couldn’t see it either.  I thought it was perfect — just what I was looking for.  I wanted a very standard, industrial-looking cart, and was able to get this one for $80.  (While some of you may be rolling your eyes that I paid $80 for this — given what bar carts actually cost, I feel like I got a bargain.)

Want to know how I went from that, to this?  (Magical Cocktail Land):

photo (6)Stay tuned, the how-to and the big reveal are up tomorrow!