Category Archives: DIY

DIY / weekend

DIY: Blinged-Out Basement Pipes

June 2, 2014

You may recall that we have some ugly pipes in our downstairs laundry/family room. ↓

laundry 2I think they used to belong to a water heater that formerly existed down there, but they’ve long since become defunct since our water heater is elsewhere in the house.

KC and I didn’t feel comfortable cutting the pipes and then sealing the wall, given that we’re renting, so we just let them hang out for a bit.  However, after we redid the basement space, we started thinking about how we could jazz up the pipes so they didn’t look so… “hey this used to be a basement,” y’know?

After I became infatuated with Rustoleum metallic gold spray paint while redoing the trunk for that space, we came up with the idea to paint the pipes gold.  We couldn’t really hide them effectively, so why not make them a little focal point instead?

This past weekend I rolled up my sleeves and blinged out those pipes like you wouldn’t believe.  It was crazy easy (spray painting is amazing) — the worst part was prepping the space to make sure I didn’t spray paint anything I wasn’t supposed to.  (As much as I love the idea of everything being metallic gold, I figured I should curb my Midas tendencies and keep the gold confined to the pipes).

I was feeling pretty good about things when I started in with the painters tape prep:
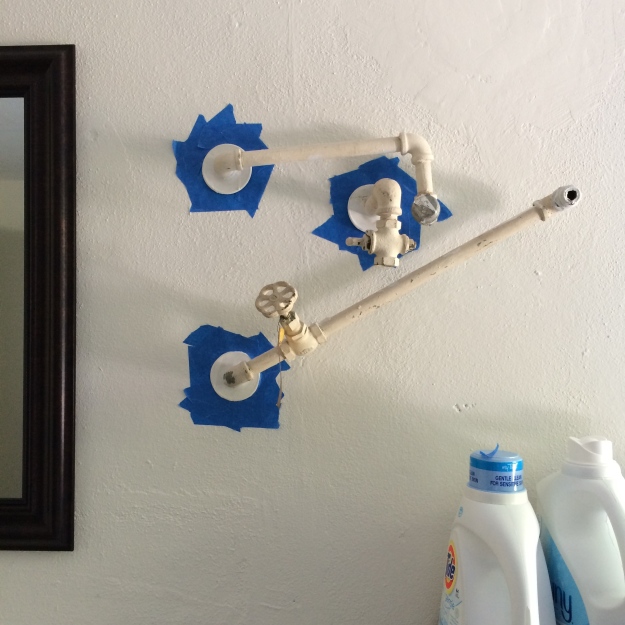
IMG_2841Looking pretty good right?  Well, things kind of got… less professional-looking as I started really covering the space…
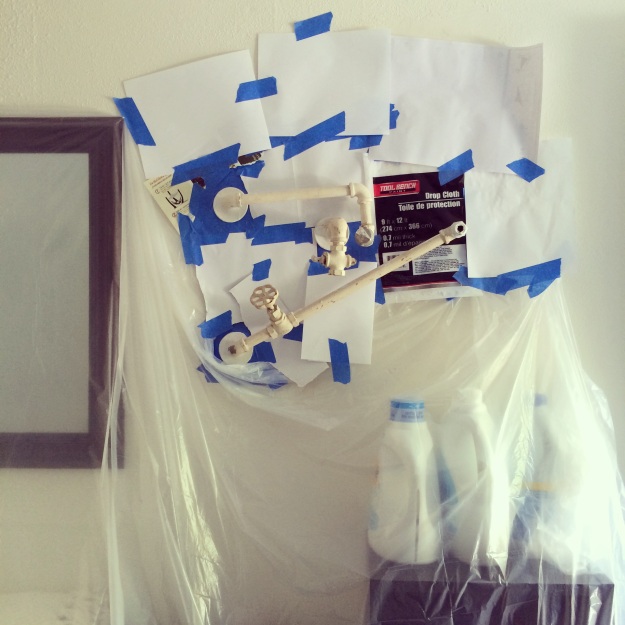
IMG_2845Whatever.  I mean, it did the trick.  Who cares if I had to use a quarter of a roll of painters tape for this monstrosity?  (Ok, maybe a half a roll…)

I primed the pipes with some leftover Kilz Original Primer Sealer Spray:
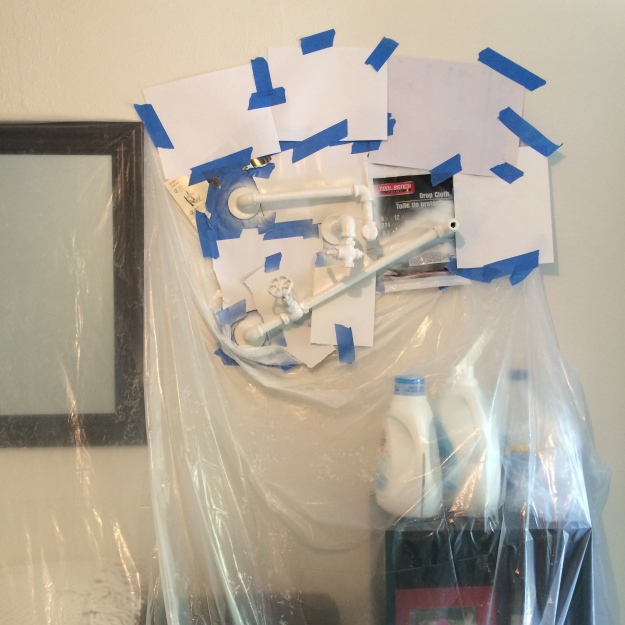
IMG_2847Looking better already, right?  Also, doesn’t all the plastic make it look like some sort of weird murder-room?  No?  Just me?  Anyway…

After the primer dried, I got to spraying those bad boys gold:
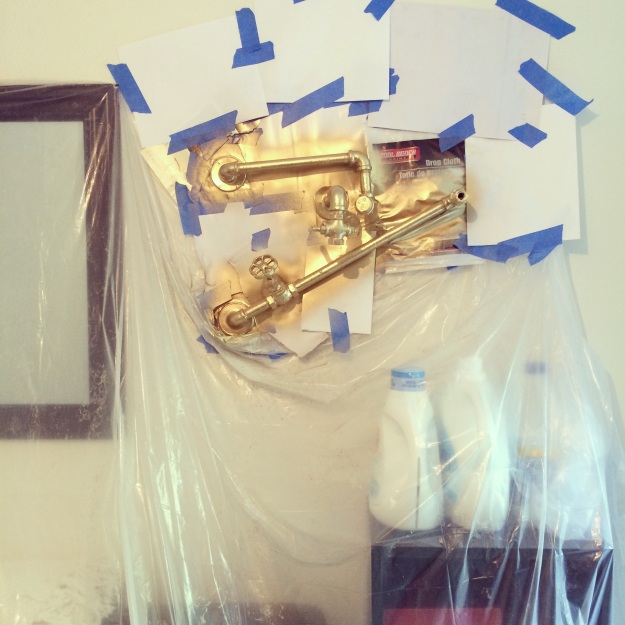
IMG_2850If you’re thinking this is lessening my obsession with the Rustoleum metallic spray paint, you’d be dead wrong.

I think the gold is quite an improvement:
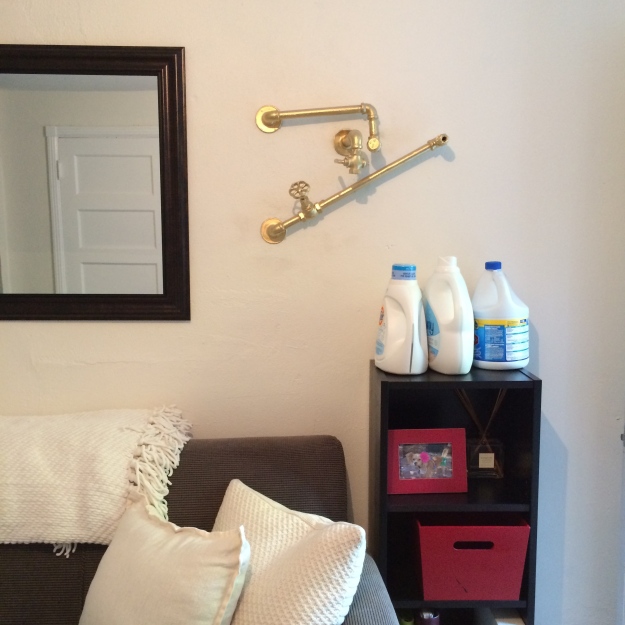
IMG_2851 IMG_2853I’m maybe going to paint all the things.  Gold everything!


Budget-Friendly Weekend Fun / DIY / weekend

DIY: The Finished Trunk

April 15, 2014

Our newly-updated trunk is fully cured and now brightening our new downstairs space.  There’s still more work to be done down there (adding artwork to the walls, painting the ugly wall pipes gold), but I think the mint and gold masterpiece is a nice little addition for now.  (Although it does make me think about swapping out some of the pillows on the couch to make the space a little lighter and more on the blue/green scale…)

room 1room 2room 3room 4

I think the gold hinges really make a difference with this piece.  But then again, I’m sort of obsessed with gold spray paint, so…

PS:  The stack of records on the trunk were my grandpa’s, and yes, the one on top is Mr. Rogers’ “Won’t You Be My Neighbor?” 🙂

Budget-Friendly Weekend Fun / DIY / weekend

DIY: Trunk Update

April 14, 2014

As expected, once I got the idea to update the trunk in our new downstairs laundry/family room, I knew I was going to have to follow through on my mint green and gold dreams.

Here’s where things started:

laundry 1On old, dinged-up trunk that I got for free (and I think was maybe originally from Cost Plus?  Who knows.)

I removed the hardware from the trunk (2 back hinges, 2 side handles, front closure, and unscrewed the internal hinge) so I could paint those separately.  Removing the hardware also made painting the trunk a lot easier, because I didn’t have to tape and paint around anything.

Here’s the trunk with the hardware removed:

Trunk 1First I primed and painted the hardware, using Kilz spray primer and Rustoleum metallic gold spray paint.

Original hardware:

Hinges 1Primed:

Hinges primedPainted:

Hinges paintedIf you’re thinking that metallic gold spray paint is awesome — well, you’re right.  It totally is.

Next I got to work on the trunk.  First I sanded down the surfaces I wanted to paint using an electric sander.  Like I’ve said before, I hate sanding, so I just did a quick once-over with the sander to rough up the surface to make sure the primer would adhere.

I then did one solid coat with the primer (Glidden Gripper, you are amazing), and let that dry:

Trunk primed 2I didn’t bother to paint the inside of the trunk because I a. didn’t want paint to potentially get on any of the 47 blankets I like to store in there and b. I didn’t think it was necessary since no one was really going to see that anyway.

After the primer dried, I started in with the paint.  I used a small roller and brush to apply 2 solid coats of Behr Kiwi Squeeze (allowing time to dry in between), and did an extra coat on the top of the trunk, since that would likely get the most wear and tear.

All painted:

Trunk painted 2After that dried, I screwed the (newly gold) hardware back on, and left the trunk in the basement to cure:

Hardware back onTrunk finished 1Trunk finished backOnce the paint had cured for 7 days, I sprayed the top with a couple coats of indoor water-based polyurethane to seal it (since it will likely have drinks sitting on it, food/water/whatever).

And now, the how-to:

How to Paint a Wood Trunk

 Materials I used:

How I did it:

  1. Remove hardware with a screwdriver and place on a drop cloth.  Spray with 1-2 coats Kilz Original Primer Sealer Spray and let dry.  Spray with Rustoleum Metallic Gold Spray Paint — as many coats as you need to get the coverage you want, allowing time to dry between each coat.
  2. Sand the surface of the trunk where paint will be applied with medium-grit sandpaper.  A quick once-over with an electric sander should do the trick — you’re just looking to rough up the surface a little so the primer will adhere.
  3. Wipe down the trunk with a clean, dry cloth to remove any dust and then transfer it onto your drop cloth.
  4. Paint 1-2 light coats with Glidden Gripper Primer, making sure that all surfaces that will be painted are well covered and let dry.  Don’t worry if the coverage isn’t opaque yet, the paint will take care of this.  You want to just make sure that the primer is covering all surfaces so the paint has something to adhere to.
  5. Paint trunk with at least 2 solid coats of your paint of choice (I like to use semi-gloss for furniture), allowing time to dry between each coat.  I do more coats on surfaces that will get a lot of use — like tabletops, the top of the trunk, etc.  Using a roller for this step is helpful because you don’t end up with brush stroke marks on your piece of furniture.
  6. Once the paint has dried, reattach the hardware and let the paint cure for at least a week.
  7. Once the paint is set and cured (it no longer feels at all sticky or tacky), spray the top of the trunk with at least 2 coats of the Polyurethane Spray to seal it, allowing time to dry between each coat.

And voila!  Brand new trunk.

Finalized pictures of the piece in our laundry/family room will be up tomorrow!

Trunk finished front

DIY

Can't Stop Won't Stop

March 26, 2014

I think I might be going a little DIY-crazy, because I got it into my head last night that I should definitely paint the trunk that now resides in our new downstairs laundry/family room:

laundry 1The trunk was free (a Bar Method friend was getting rid of it a few years ago and I was an incredibly poor law student at the time) and it’s pretty worn and dinged up,so I feel like painting can only improve it, right?

I was thinking a little bit of Behr’s Kiwi Squeeze + some metallic gold hinges might be just the thing…

Behr Kiwi SqueezeI might just be insane.

KC might secretly be thinking about divorcing me.  (Except that he’s not because I’m awesome and he secretly loves a DIY project.)

I think a mint green trunk with gold hinges might just take the downstairs to a whole. other. level.

I guess we’ll have to wait and see…

Budget-Friendly Weekend Fun / DIY

Laundry Room DIY: The Big Reveal

March 24, 2014

Alright, I won’t keep you waiting any longer.  I’ve got the after shots of the laundry room coming up in this post! Exciting!

This room is crazy hard to photograph (it’s only got one window, it’s almost perfectly square and the entrance is stairs — I mean, it’s a basement), but I did my best.

laundryPenny is the number-one photo bomber in our house.

You can see that we left a non-carpeted space by the back door.  Since we go in and out to the backyard here, we opted not to carpet that area to cut down on the dirt we’d be tracking in, and opted instead for an industrial welcome-mat to wipe muddy feet on.

laundry 1

The carpet squares we chose are seamless and a bit multi-colored.  Since there’s a bit of foot-traffic in this area, we thought that having something that wasn’t all one color would help hide dirt a bit better.  We originally were considering installing plank flooring down here, but determined that because the floor was so warped that it would be too much hassle or look crappy.  The carpet tiles ended up being a perfect solution because they were super easy to install, cover the flaws of the floor, make the space much cozier and act as a bit of soundproofing as well (always important when you’re renting and have neighbors!)laundry 2KC has been using the space quite a bit to get work done lately.

We chose to paint the walls white because the room only has one window (which gets zero direct sunlight), it’s not the brightest space. The green walls, in addition to being ugly, sucked a lot of the light out of the space and made it feel very basement-y and unwelcome.  I wanted to brighten up the space and make it a bit warmer, so we chose a creamy white with just a hint of a yellow/peach undertone.  It offsets the bright white trim nicely, and makes the space seem larger and lighter as well.  (Note: I did take home at least 3 dozen paint cards from Home Depot and Ace trying to find the “perfect” white for the space.  It was really helpful to hold the swatches up against the trim during daylight hours to see how each would look on the walls.  It’s amazing how different whites are — some were “too white” and looked like paint primer, others were obviously pink when held up against the bright white trim, others were way too yellow or a tad green.  In the end, I narrowed the choices down to three, and eventually went with Behr’s Almond Cream.)

We opted to hang a (cheap) mirror over the couch to help the space look a little larger and to reflect the overhead light in the room — another trick to help lighten up the space on the cheap.

laundry 3KC loves to be photographed.

Not bad for a budget redo, I think.  We’ve got some plans to spruce things up a little more with some pictures/artwork for the blank wall above KC’s head, and possibly the relocation of a TV (for extreme lounging), but that’s all down the line for now.

Here’s what we did to the space and the materials we used:

  1. KC patched the giant hole in the wall using some kind of purple board patch and patch kit from Home Depot.
  2. He filled in all the random holes with spackle and let it dry overnight.
  3. We painted the walls Almond Cream by Behr (flat finish, paint + primer in one) — hooray, no more pukey-green paint!
  4. Installed 2 packs of seamless carpet tiles in Toffee Tranquility (which I hated when I saw it in store, but like it now that it’s installed — also from Home Depot)

Notes — we bought a gallon of paint for this job, and opted for the paint and primer in one.  The paint and primer in one is clearly the way to go, especially if you’re trying to cover a dark color with a light one (or vice versa).  We did two solid coats of paint on the walls + some touch ups, and were left with barely any paint.  If you’re planning on painting a room that’s any larger than 10′ x 12′, you’ll probably need more paint than we bought.

If you have any questions about the materials we used or how we did the update, feel free to email me or leave me a comment 🙂